The client is what turns your computer into a node of the network. It runs quietly in the background, takes work from the projects you've joined when your machine is idle, and steps aside the moment you need your machine back. This guide walks you from download to your first contribution.
You'll need about ten minutes and a desktop-class machine — no cloud expertise, no configuration files, nothing to manage.
1. Download the client
Head to the Downloads page and pick your platform — Windows, macOS or Linux. Each build comes with its version, size and SHA-256 checksum right on the card. (The same page also serves the Blender add-on and the 3ds Max plugin — one place for everything installable.)
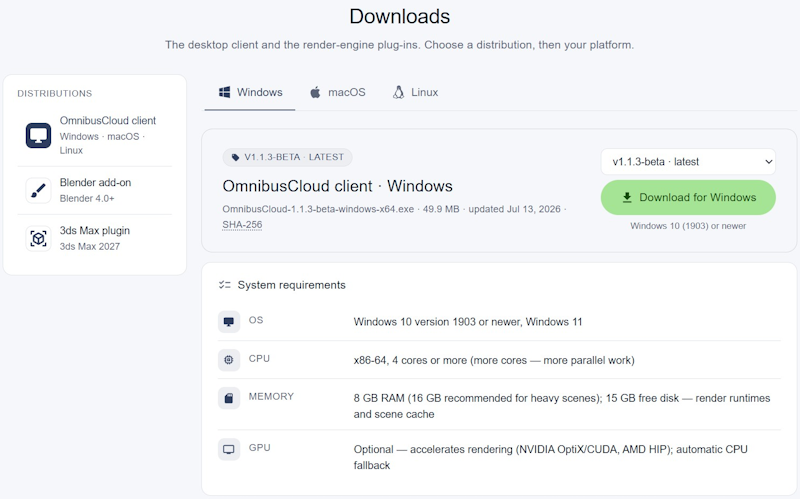
Check the system requirements below the download button: a desktop-class machine with 4+ cores and 8 GB RAM (16 GB recommended for heavy scenes), plus some free disk for render runtimes and scene cache. A GPU is optional — it accelerates rendering via NVIDIA OptiX/CUDA or AMD HIP, with automatic CPU fallback when there isn't one.
2. Install and sign in
Run the installer and follow the standard steps. On first launch the client greets you with its sign-in window: Login with Browser opens the OmnibusCloud sign-in form in your browser — one account covers the portal and every client you install; if you don't have one yet, you'll create it right there. Tick Start automatically when I sign in to this computer, and from then on the client lives quietly in the tray — that's intentional: a good node is one you forget about.
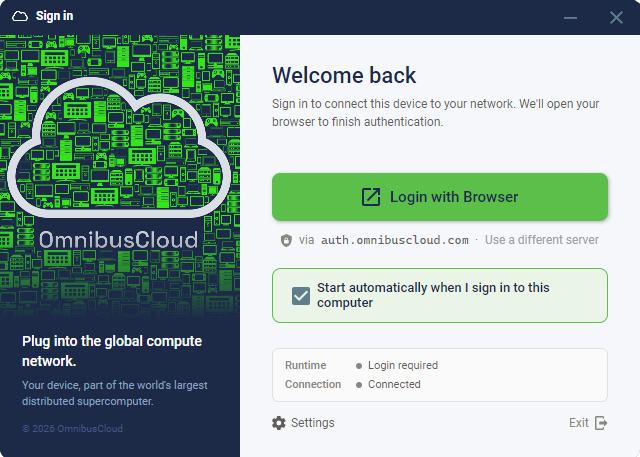
Once you're signed in, the machine is registered to your account and visible on your portal dashboard. It's connected — but nothing runs on it yet. Work only comes from projects you explicitly join.
3. Find a project to help
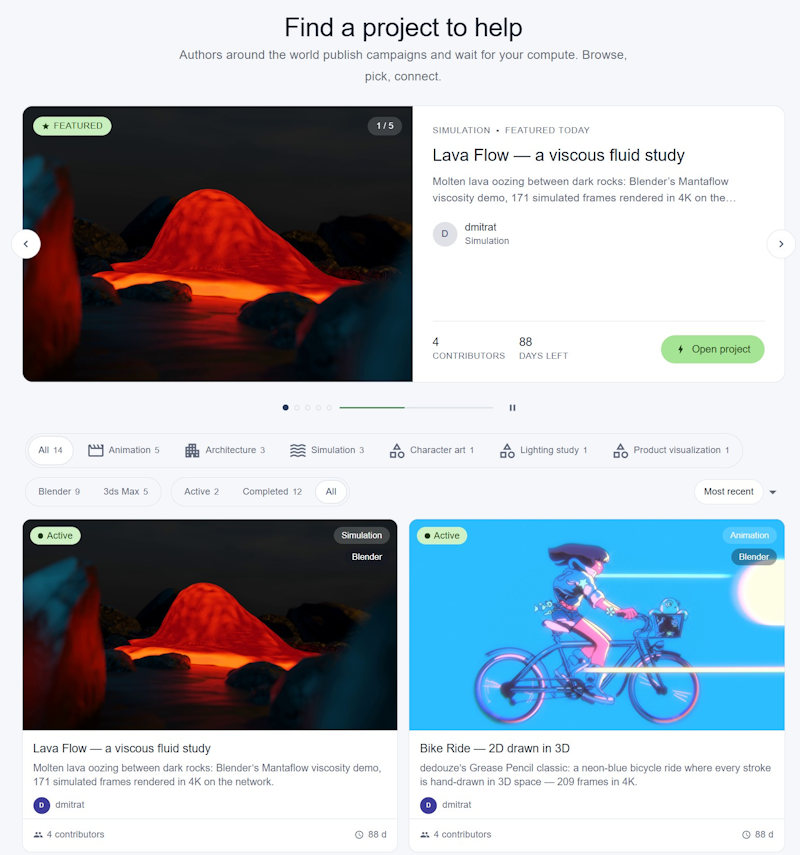
Open the portal and browse the gallery — Find a project to help: authors around the world publish campaigns and wait for your compute. A featured carousel up top, then every project as a card — filter by category (animation, architecture, simulation, …), by the tool it's made with, by active or completed.
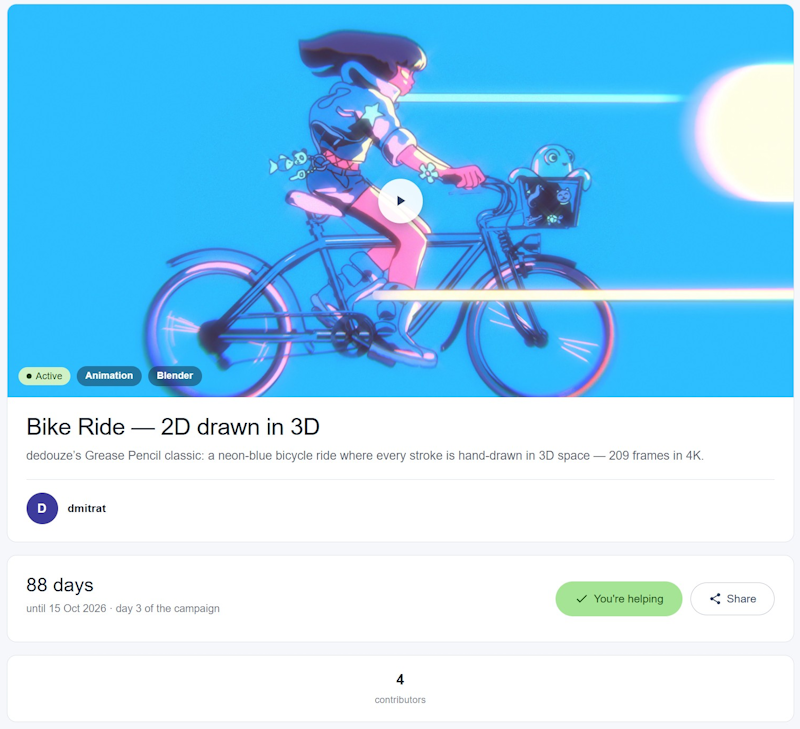
Open a project to read what it's building and who's behind it. This is the heart of crowdcomputing: your machine isn't anonymous capacity in a pool — it's helping a specific project reach a specific result.
Public projects aren't the only way to take part. A private group is an invite-only pool of machines — a team or community sharing compute among themselves, joined by invite link rather than through the gallery. Everything in this guide applies to private groups too; Getting Started with Private Groups → covers how to create and run one.
4. Join and choose your machines
Join the project right from its page. The page asks which machines should help: each of yours appears as a card with its specs and live online status — tick the ones you're lending and connect. Checked machines take the project's tasks when they're free, and you can change the lineup at any time. From then on, the project page greets you with You're helping.
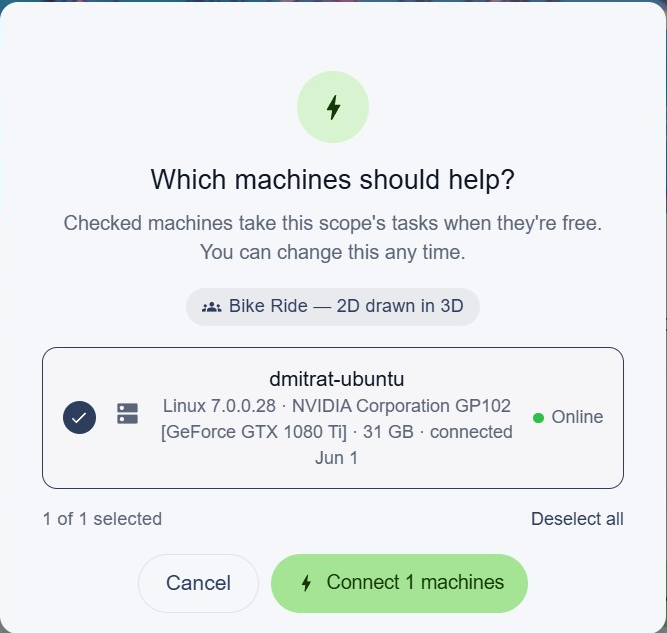
Participation is per machine, per project. Your gaming PC can support one project, your workstation another (or a private group you've been invited to), and your laptop can stay out entirely. You can change the lineup anytime from your dashboard.
5. Let it work — on your terms
That's the whole setup. When a chosen machine is online and idle, the network assigns it work that fits its capabilities — heavier tasks to a strong GPU, lighter ones to a smaller machine — and reassigns automatically if it goes offline. You don't manage any of it.
Your machine helps only when it's free, never when you need it:
- Idle-first — contribution steps aside the moment you sit down to work or play.
- On your schedule — restrict participation to nights, weekends, or any hours you choose.
- Pausable — pause any machine whenever you want your full power back; leave a project anytime.
Schedules & Control → covers the full model, and Trust & Safety → explains what runs on your machine and why it's safe.
6. Follow your contribution
Your dashboard — My contribution — shows what your machines are doing right now and where their time went: compute given (with the week's trend), projects helped, devices online. Below, your devices with live status, the active campaigns you're helping — each with days left, frames done and your compute on it — and your closed groups, with how many of your machines participate.
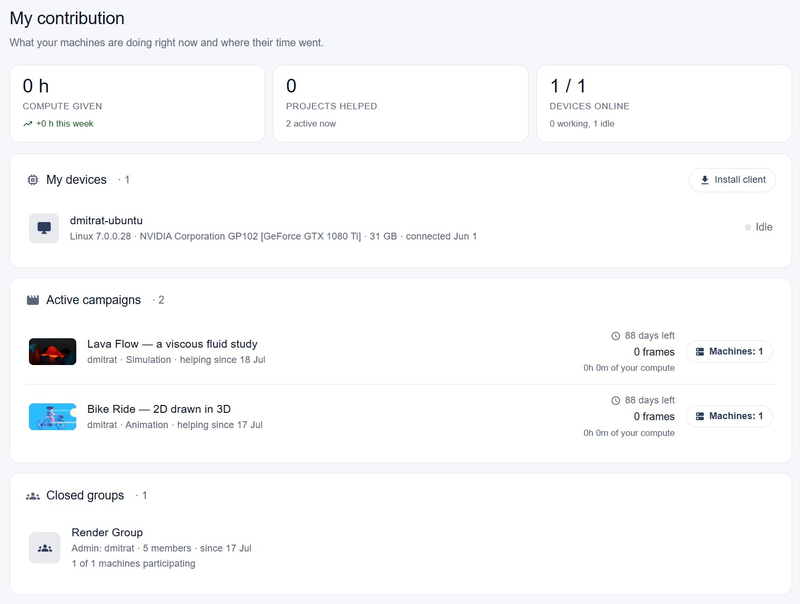
Project authors post updates as the work progresses — you'll see milestones, and when the project completes, the finished result your machine helped create.
What's next
- Have a Blender project of your own to render? → Getting Started with the Blender Add-on →
- Working in 3ds Max? → Getting Started with the 3ds Max Plugin →
- Want a private compute pool for your team? → Getting Started with Private Groups →
- Need the community's help with a big computation? → Getting Started with Campaigns →
Questions? Ask in r/OmnibusCloud → — we read everything.
Let's build the ultracomputer together!